Tutorial: Full circle skirt
You only have 1 hour for some focused sewing me-time?
Don’t worry!
In less than an hour, you can whip up a cute full circle skirt, that makes you want to twirl for days.
And the best part is: It's perfect for beginners!
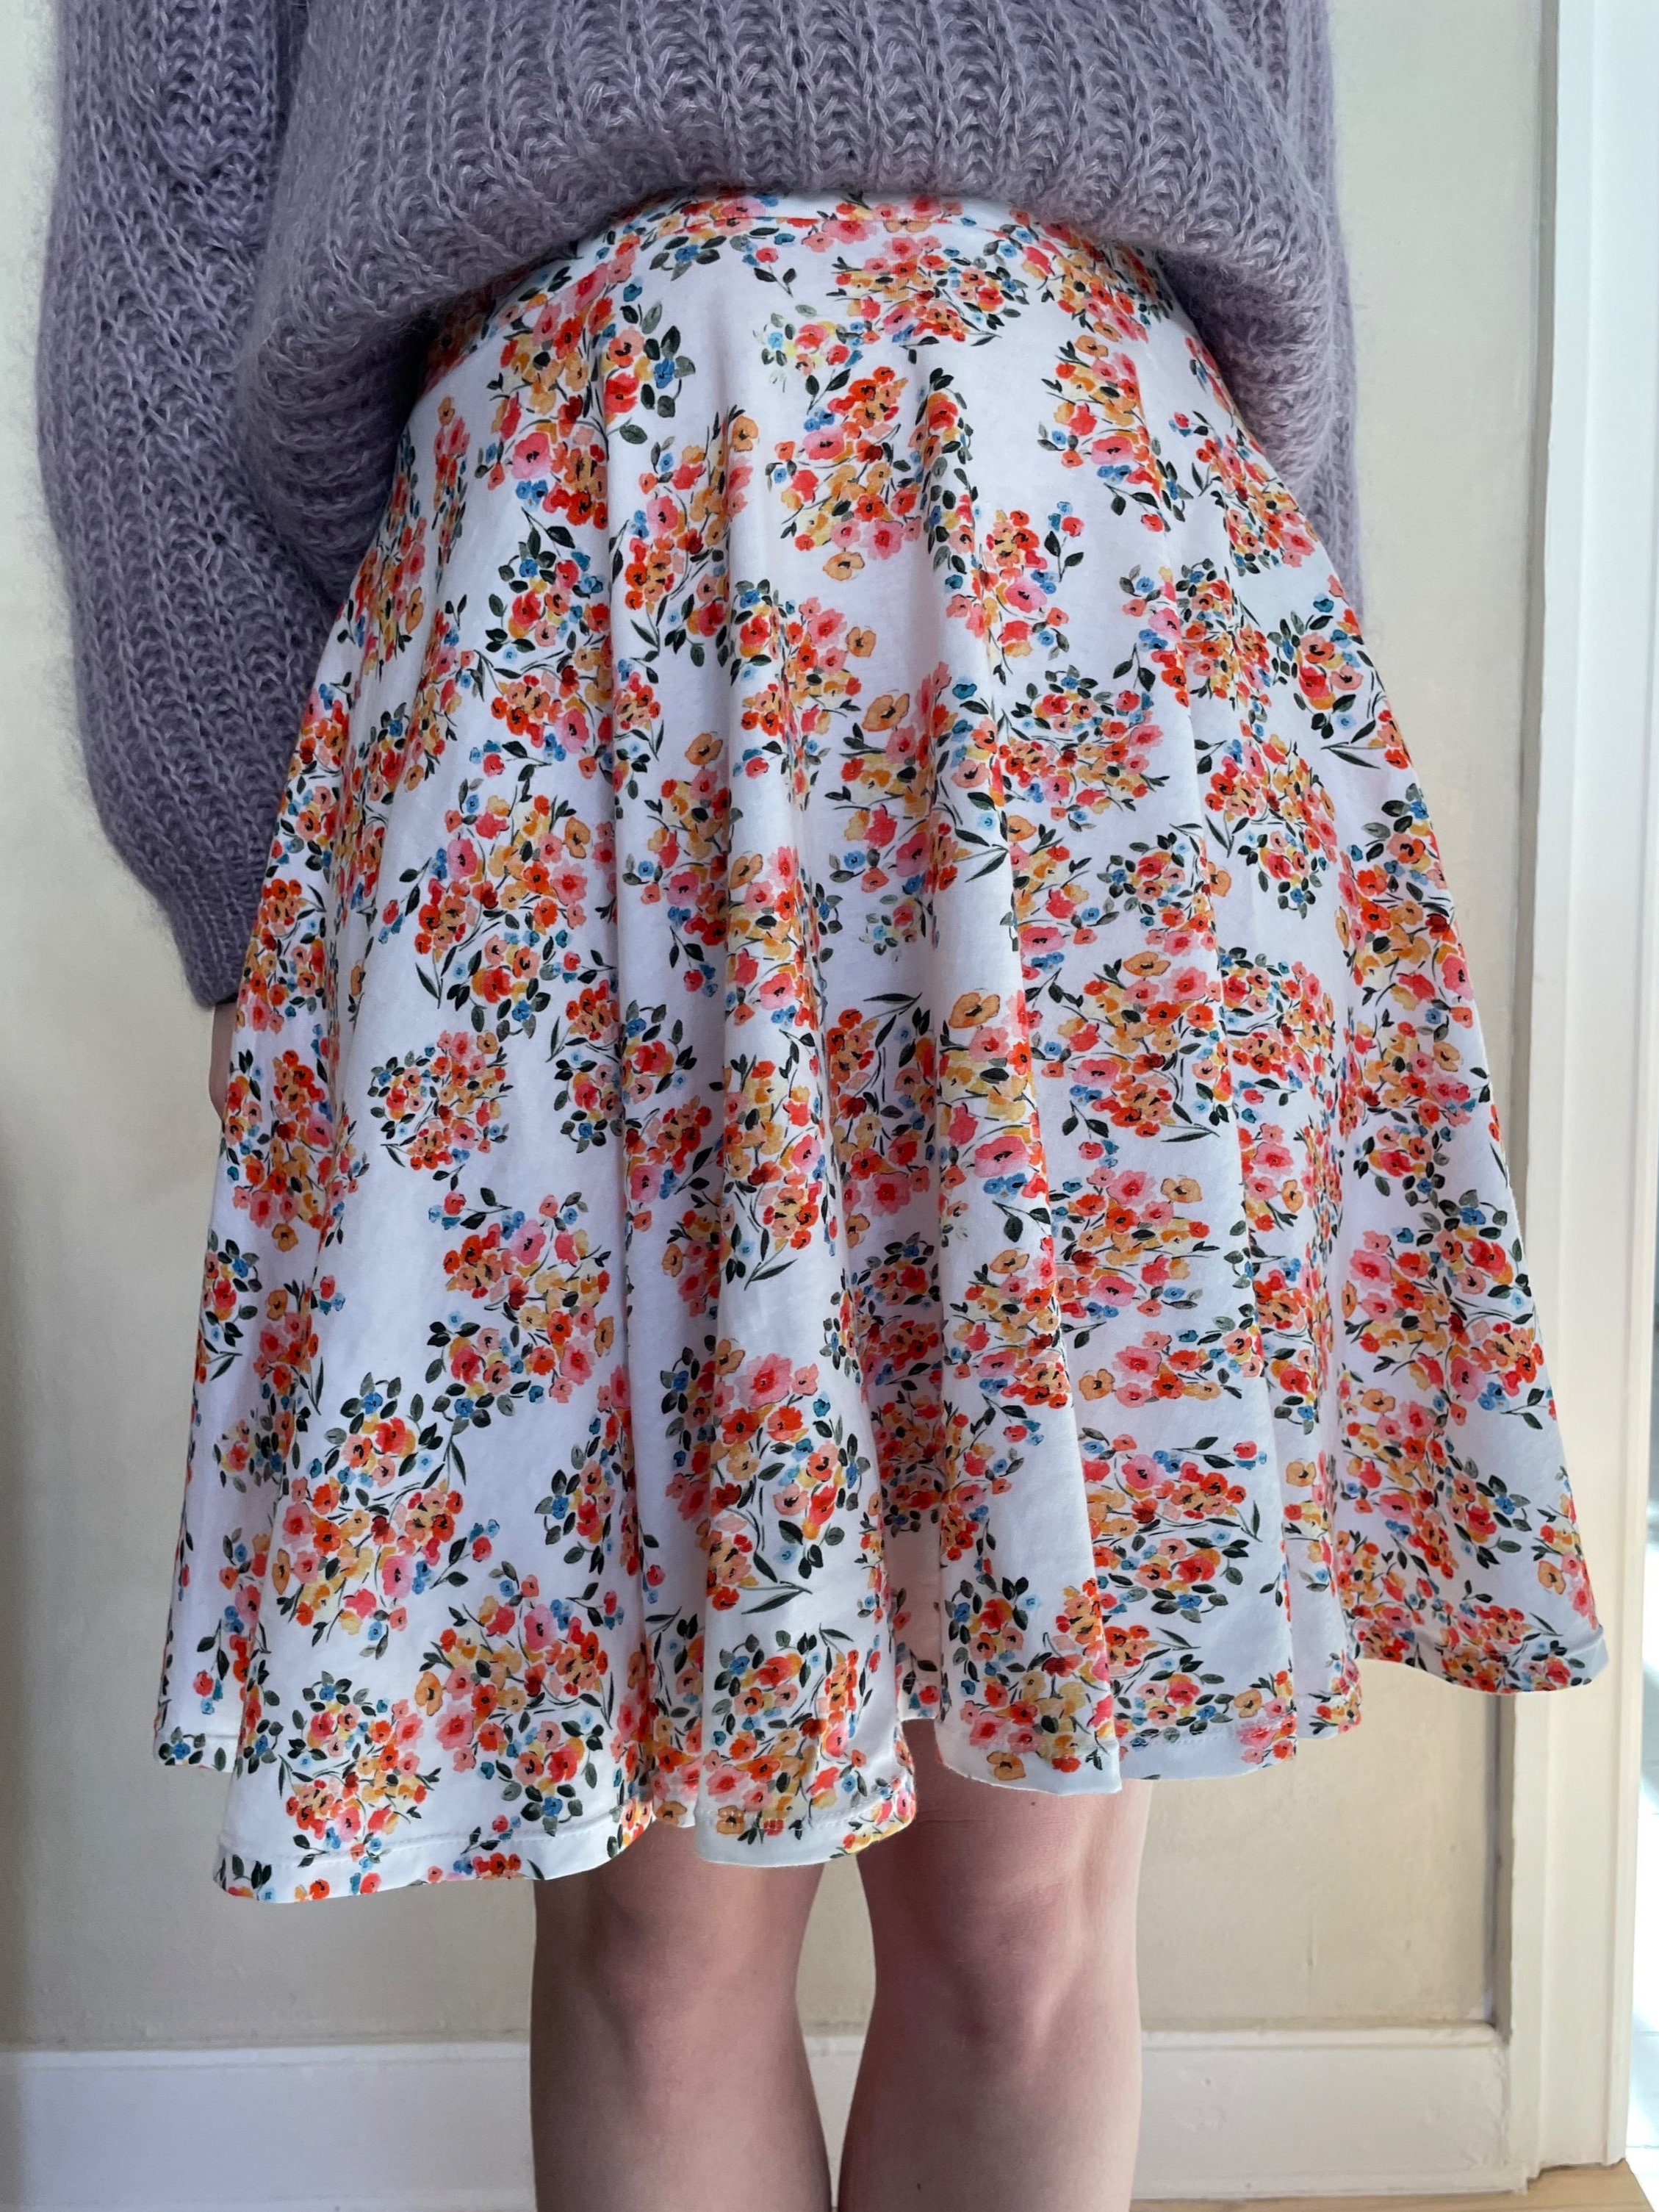
Full circle skirt: Perfect for beginners!
What do you need to make a full circle skirt?
For this project you’ll need:
Fabric (I used 140 cm 80% viscose/20% lycra)
Matching thread
A sewing machine
Serger/overlocker (or the zigzag foot on your regular machine)
Pins
Scissors
Tape measure
Water erasable pen or tailor’s chalk
Optional: Wide elastic
Optional: Twin needle
Which fabric should I use for a full circle skirt?
You can use both woven and knit fabric for this project.
I had some 80% viscose, 20% lycra in my stash, which turned out perfect for a comfortable summer skirt.
There will be slight differences whether you make the circle skirt in a woven or knit fabric, with or without stretch. If your fabric has a lot of stretch, you may need to add negative ease to your measurements or - as I did - add a wide elastic in the waistband to make sure the skirt fits snugly.
If your fabric doesn't have any stretch, and your waist measurement is much smaller than your hips, you might need to add an invisible zipper. This tutorial will not cover that part.
How to draft a pattern for a full circle skirt
There are patterns out there you can buy, if you’re not comfortable calculating the pattern yourself.
But I would recommend drafting the pattern yourself, based on your own measurements.
You will need your waist measurement. My waist measurement is 65 cm.
In order to draft the pattern, you need to know the radius of your waist measurement. If you’re not strong in math (or you’re just lazy like me), you can use a “circle skirt calculator” to get this number. I used this one from mood fabrics.
In my case the radius is 10 cm. If your fabric has a lot of stretch, I would add some negative ease to make sure it fits. My fabric had some stretch, and that made the waist a little too big after cutting.
Now you need to decide how long the skirt should be. In my case, I used fabric already in my stash, and the maximum length I could fit onto the fabric when folded, was 45 cm.
Luckily I’m very happy with that length, as it sits nicely above my knees.
Now, lets prepare the fabric, so we can trace the measurements directly!
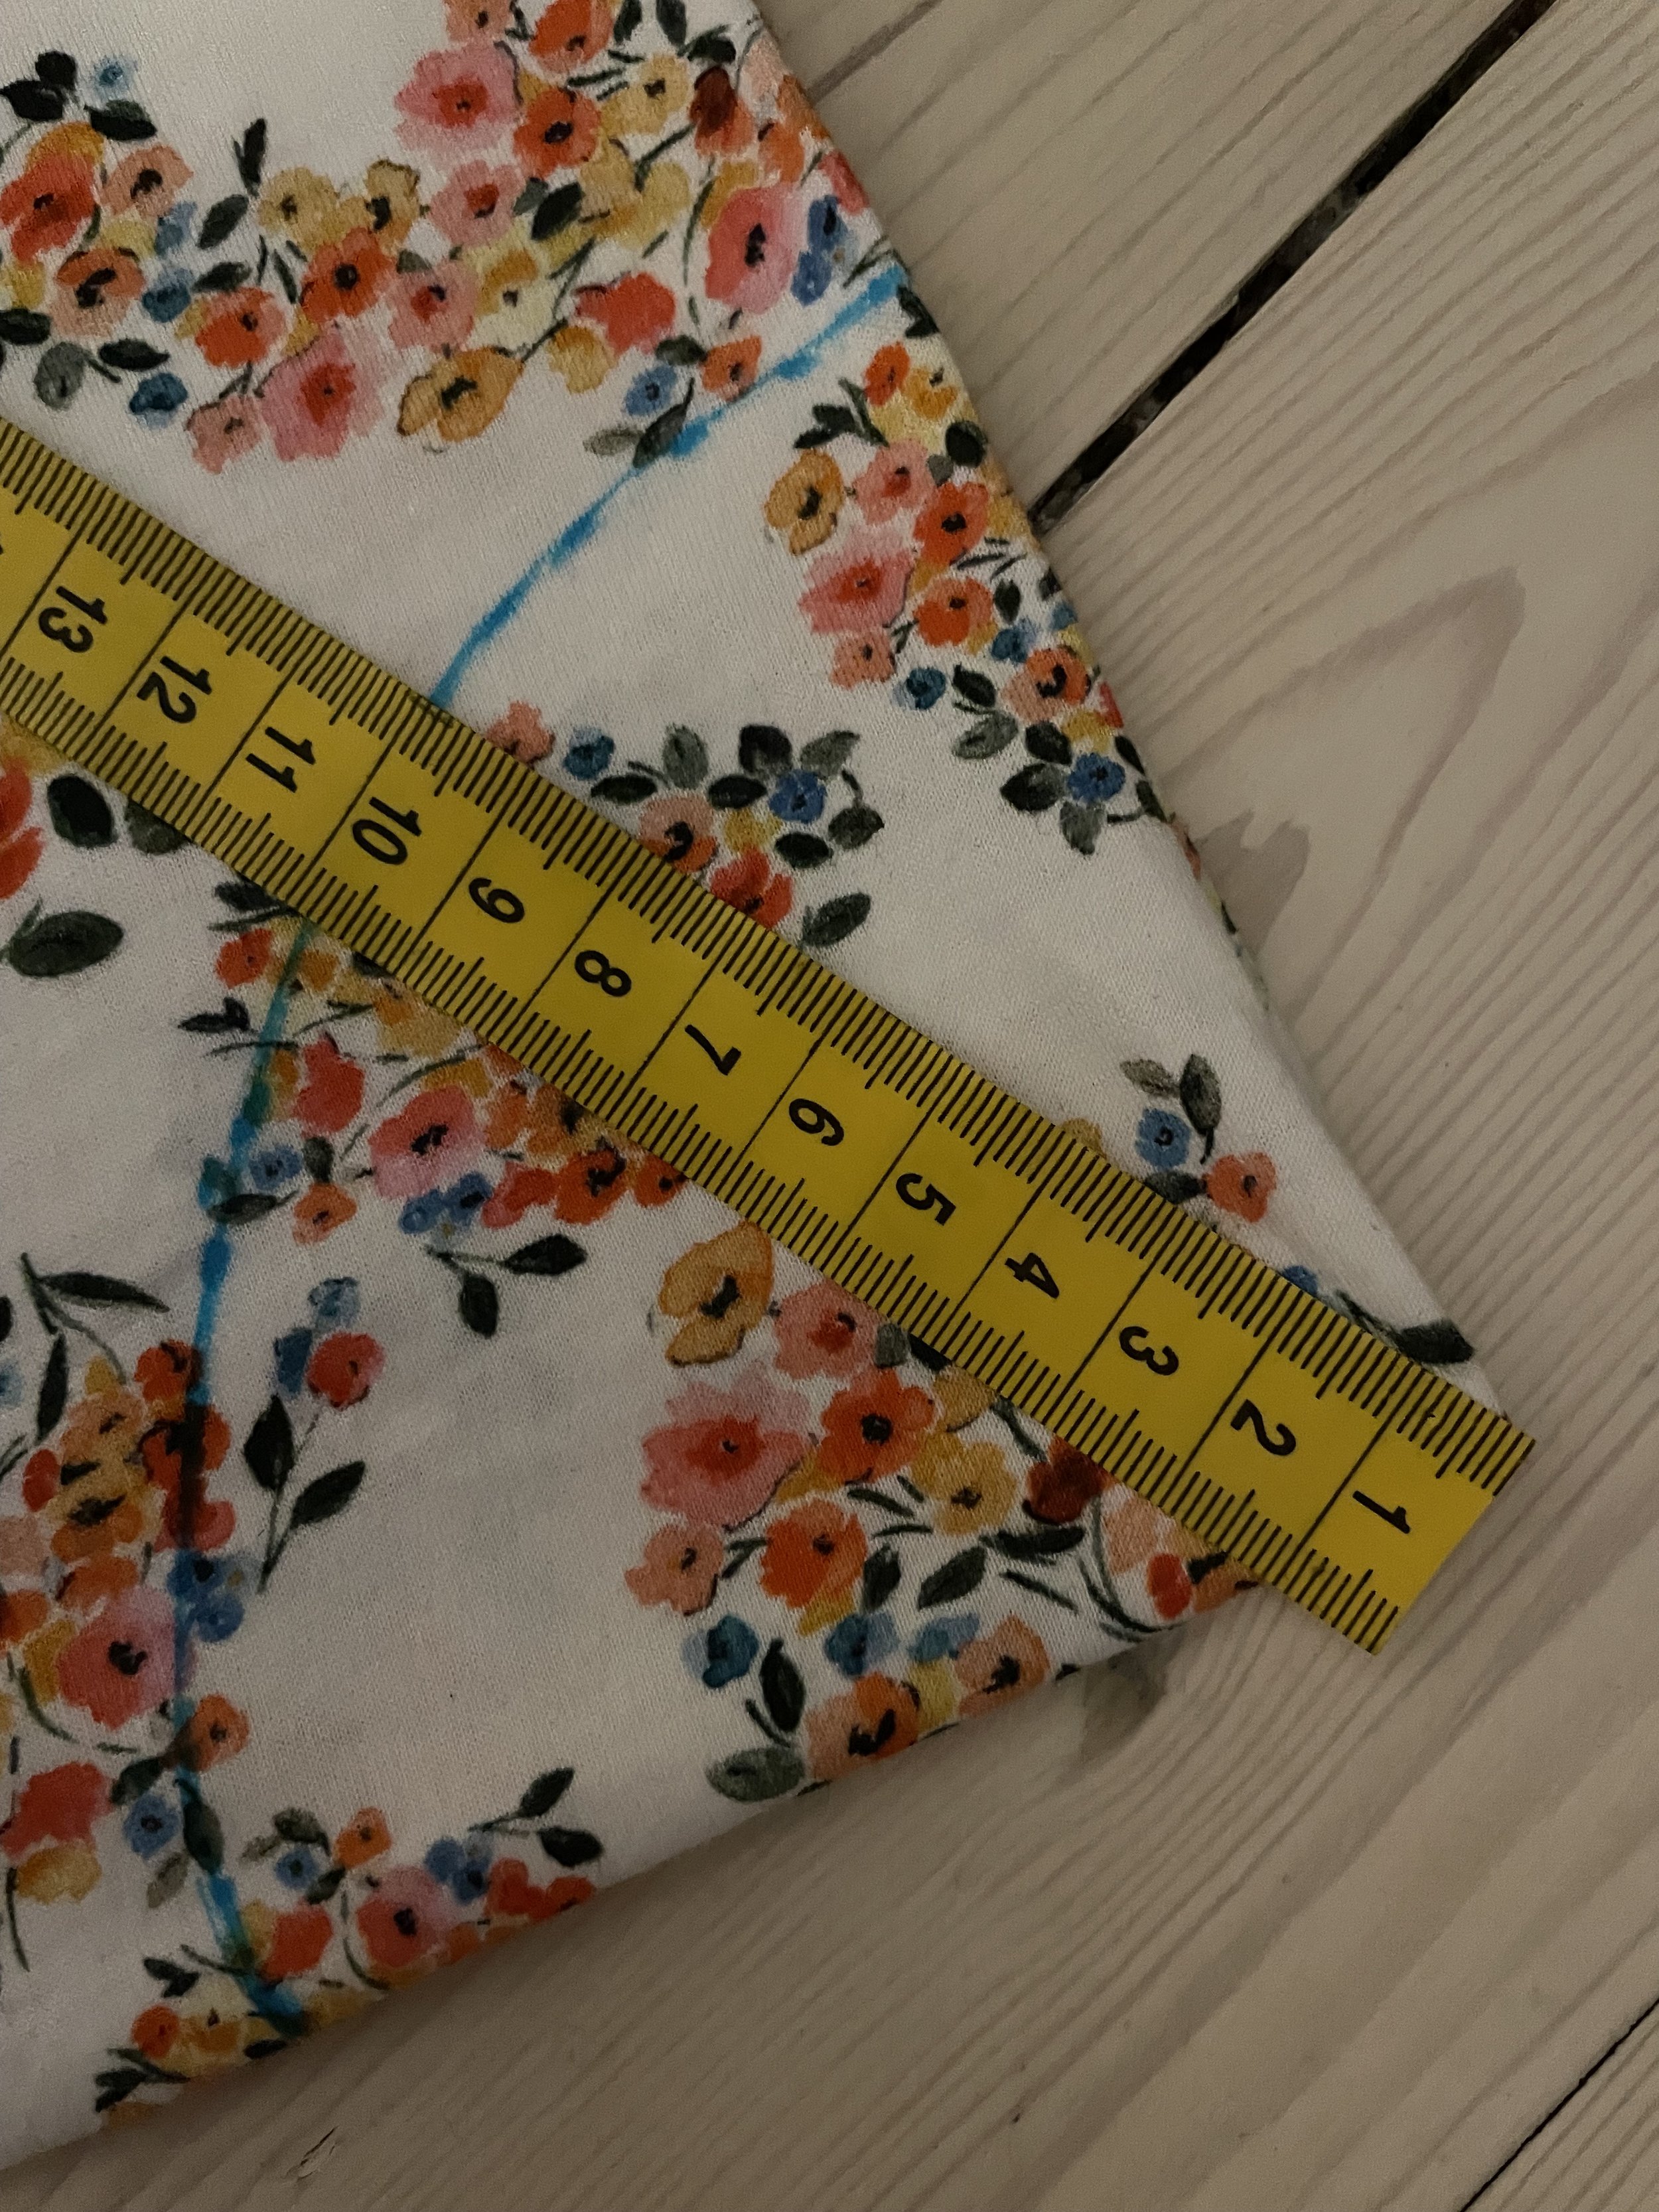
Measuring the waist radius from the folded corner.
First fold the fabric along the selvedge, then fold again on the middle. Now you’ll have one corner with only folded edges. From here you measure your waist radius and skirt length. Make enough marks, so you can draw two lines across your fabric.
I used a water erasable pen for this.

Mark your waist radius and the desired length onto the fabric
Then cut along the top and bottom lines. Still folded your skirt should look like this:
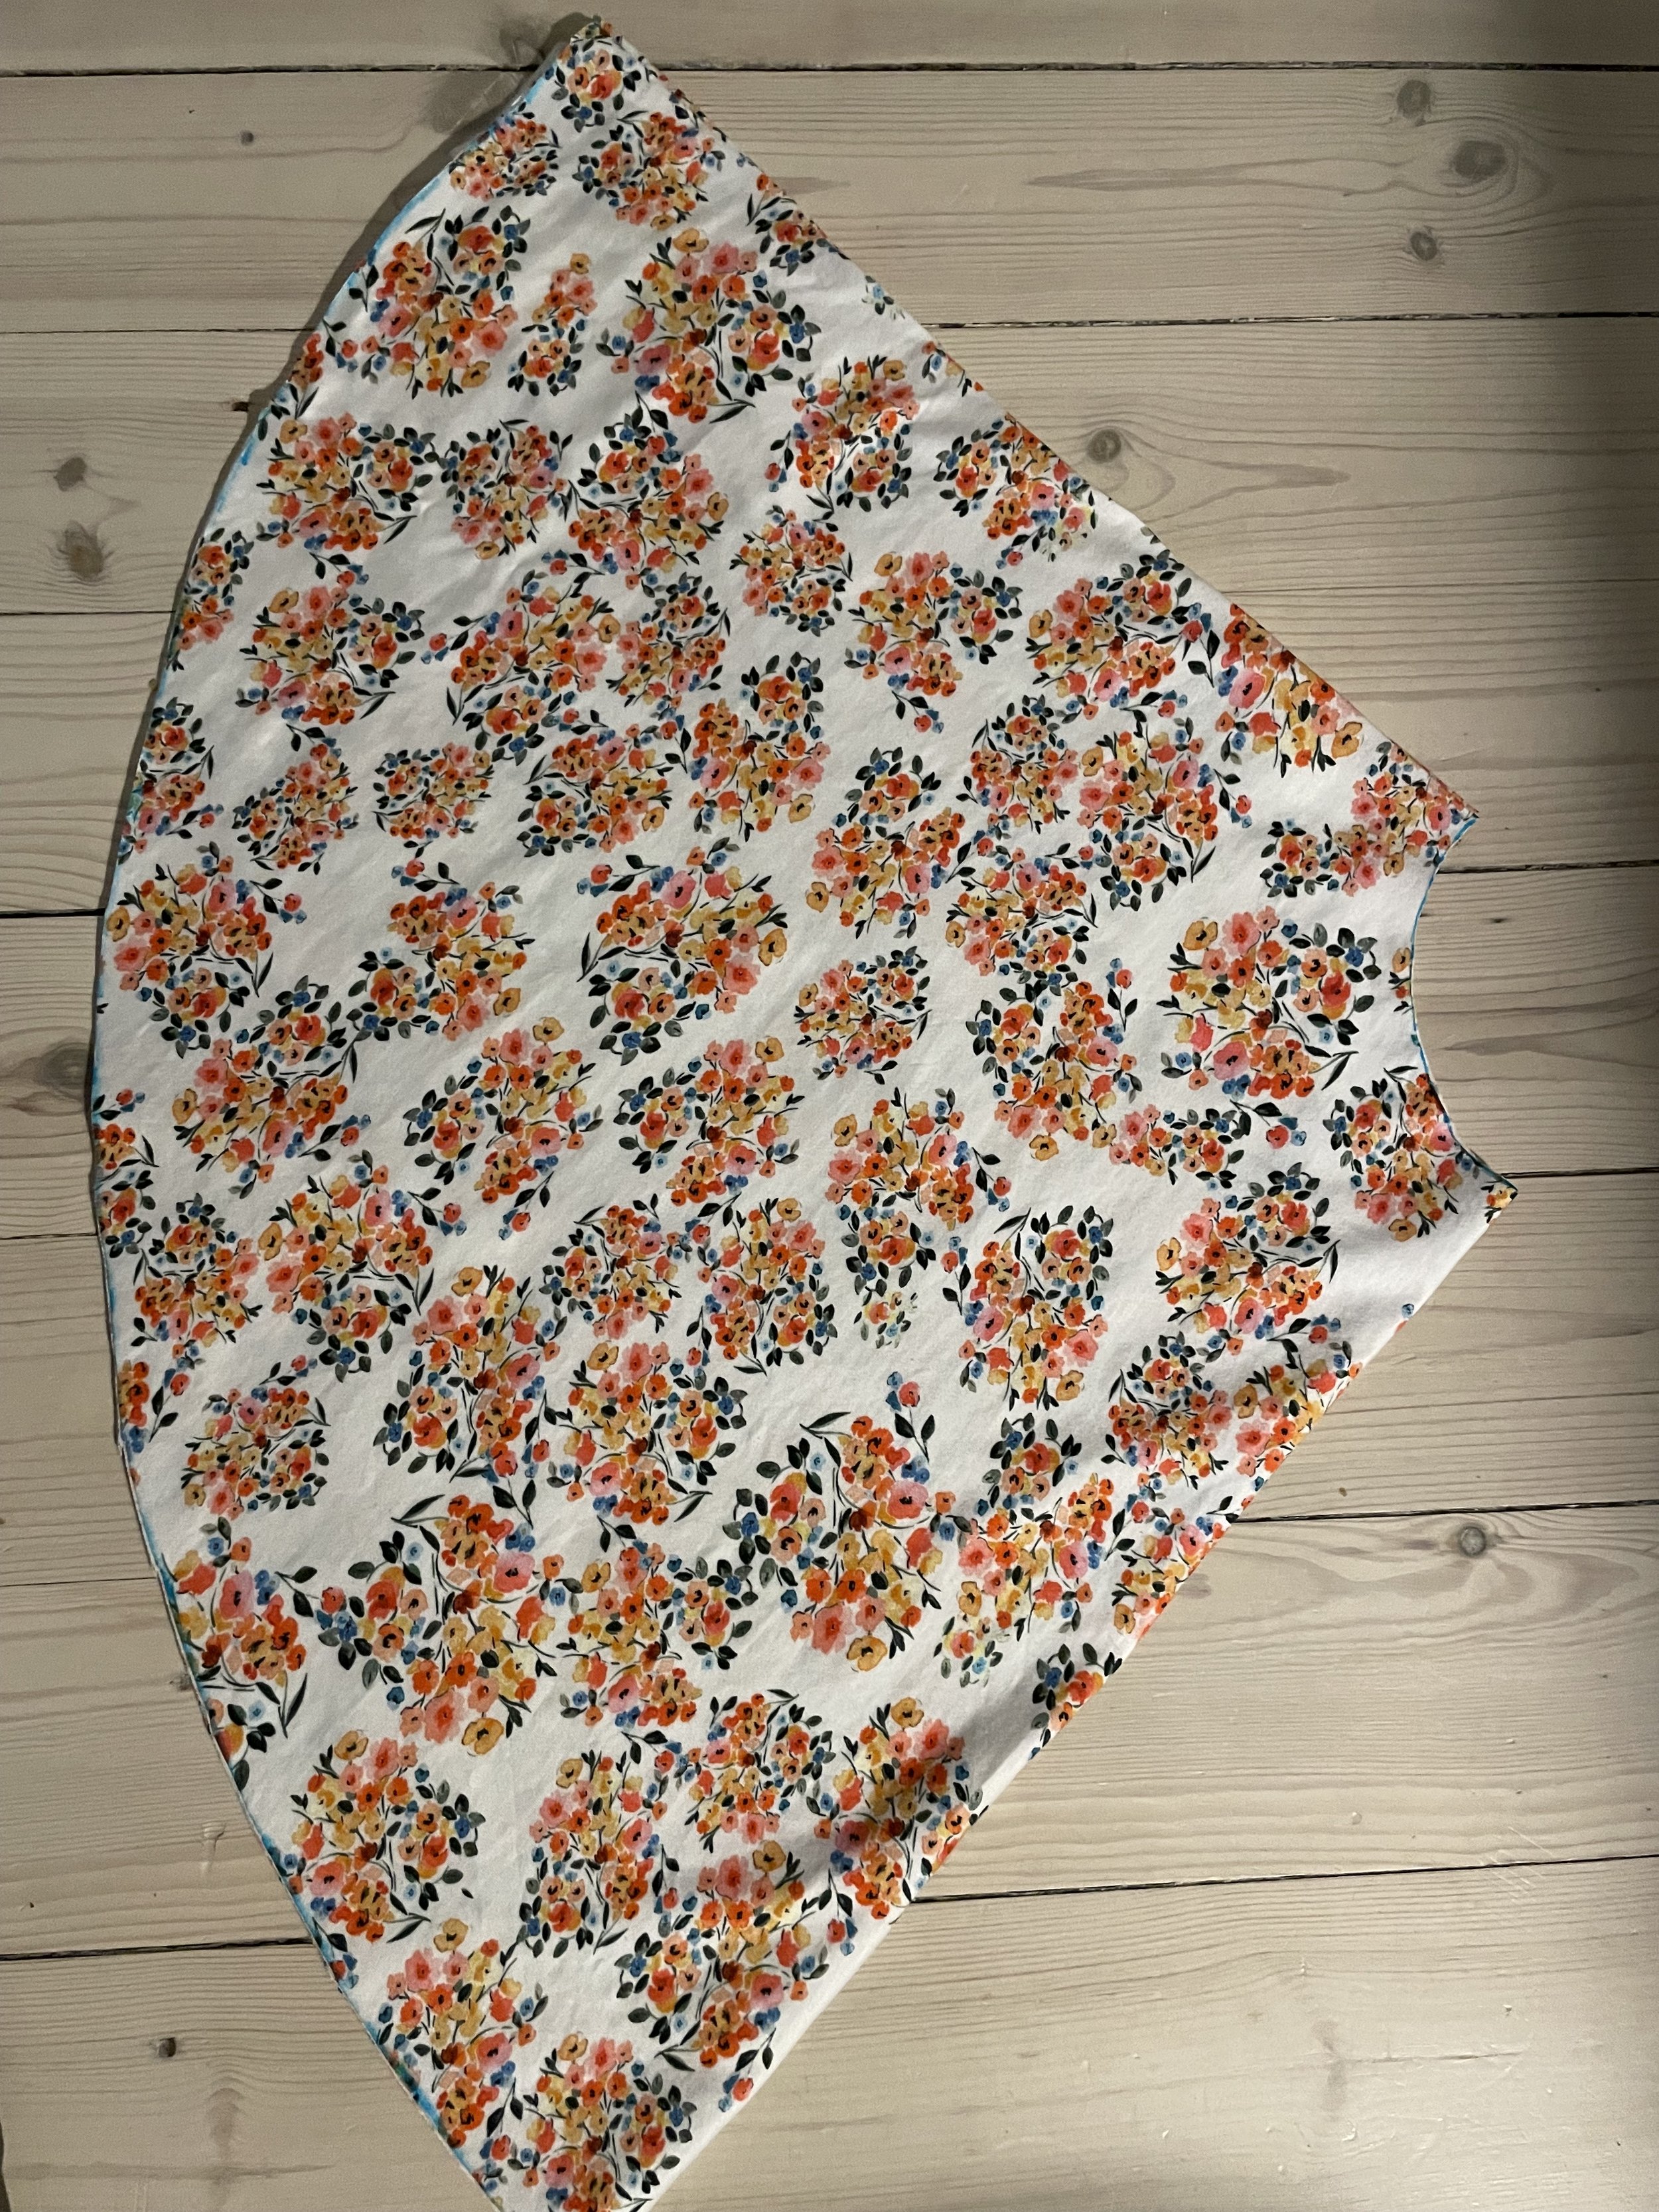
The skirt cut out (still folded)
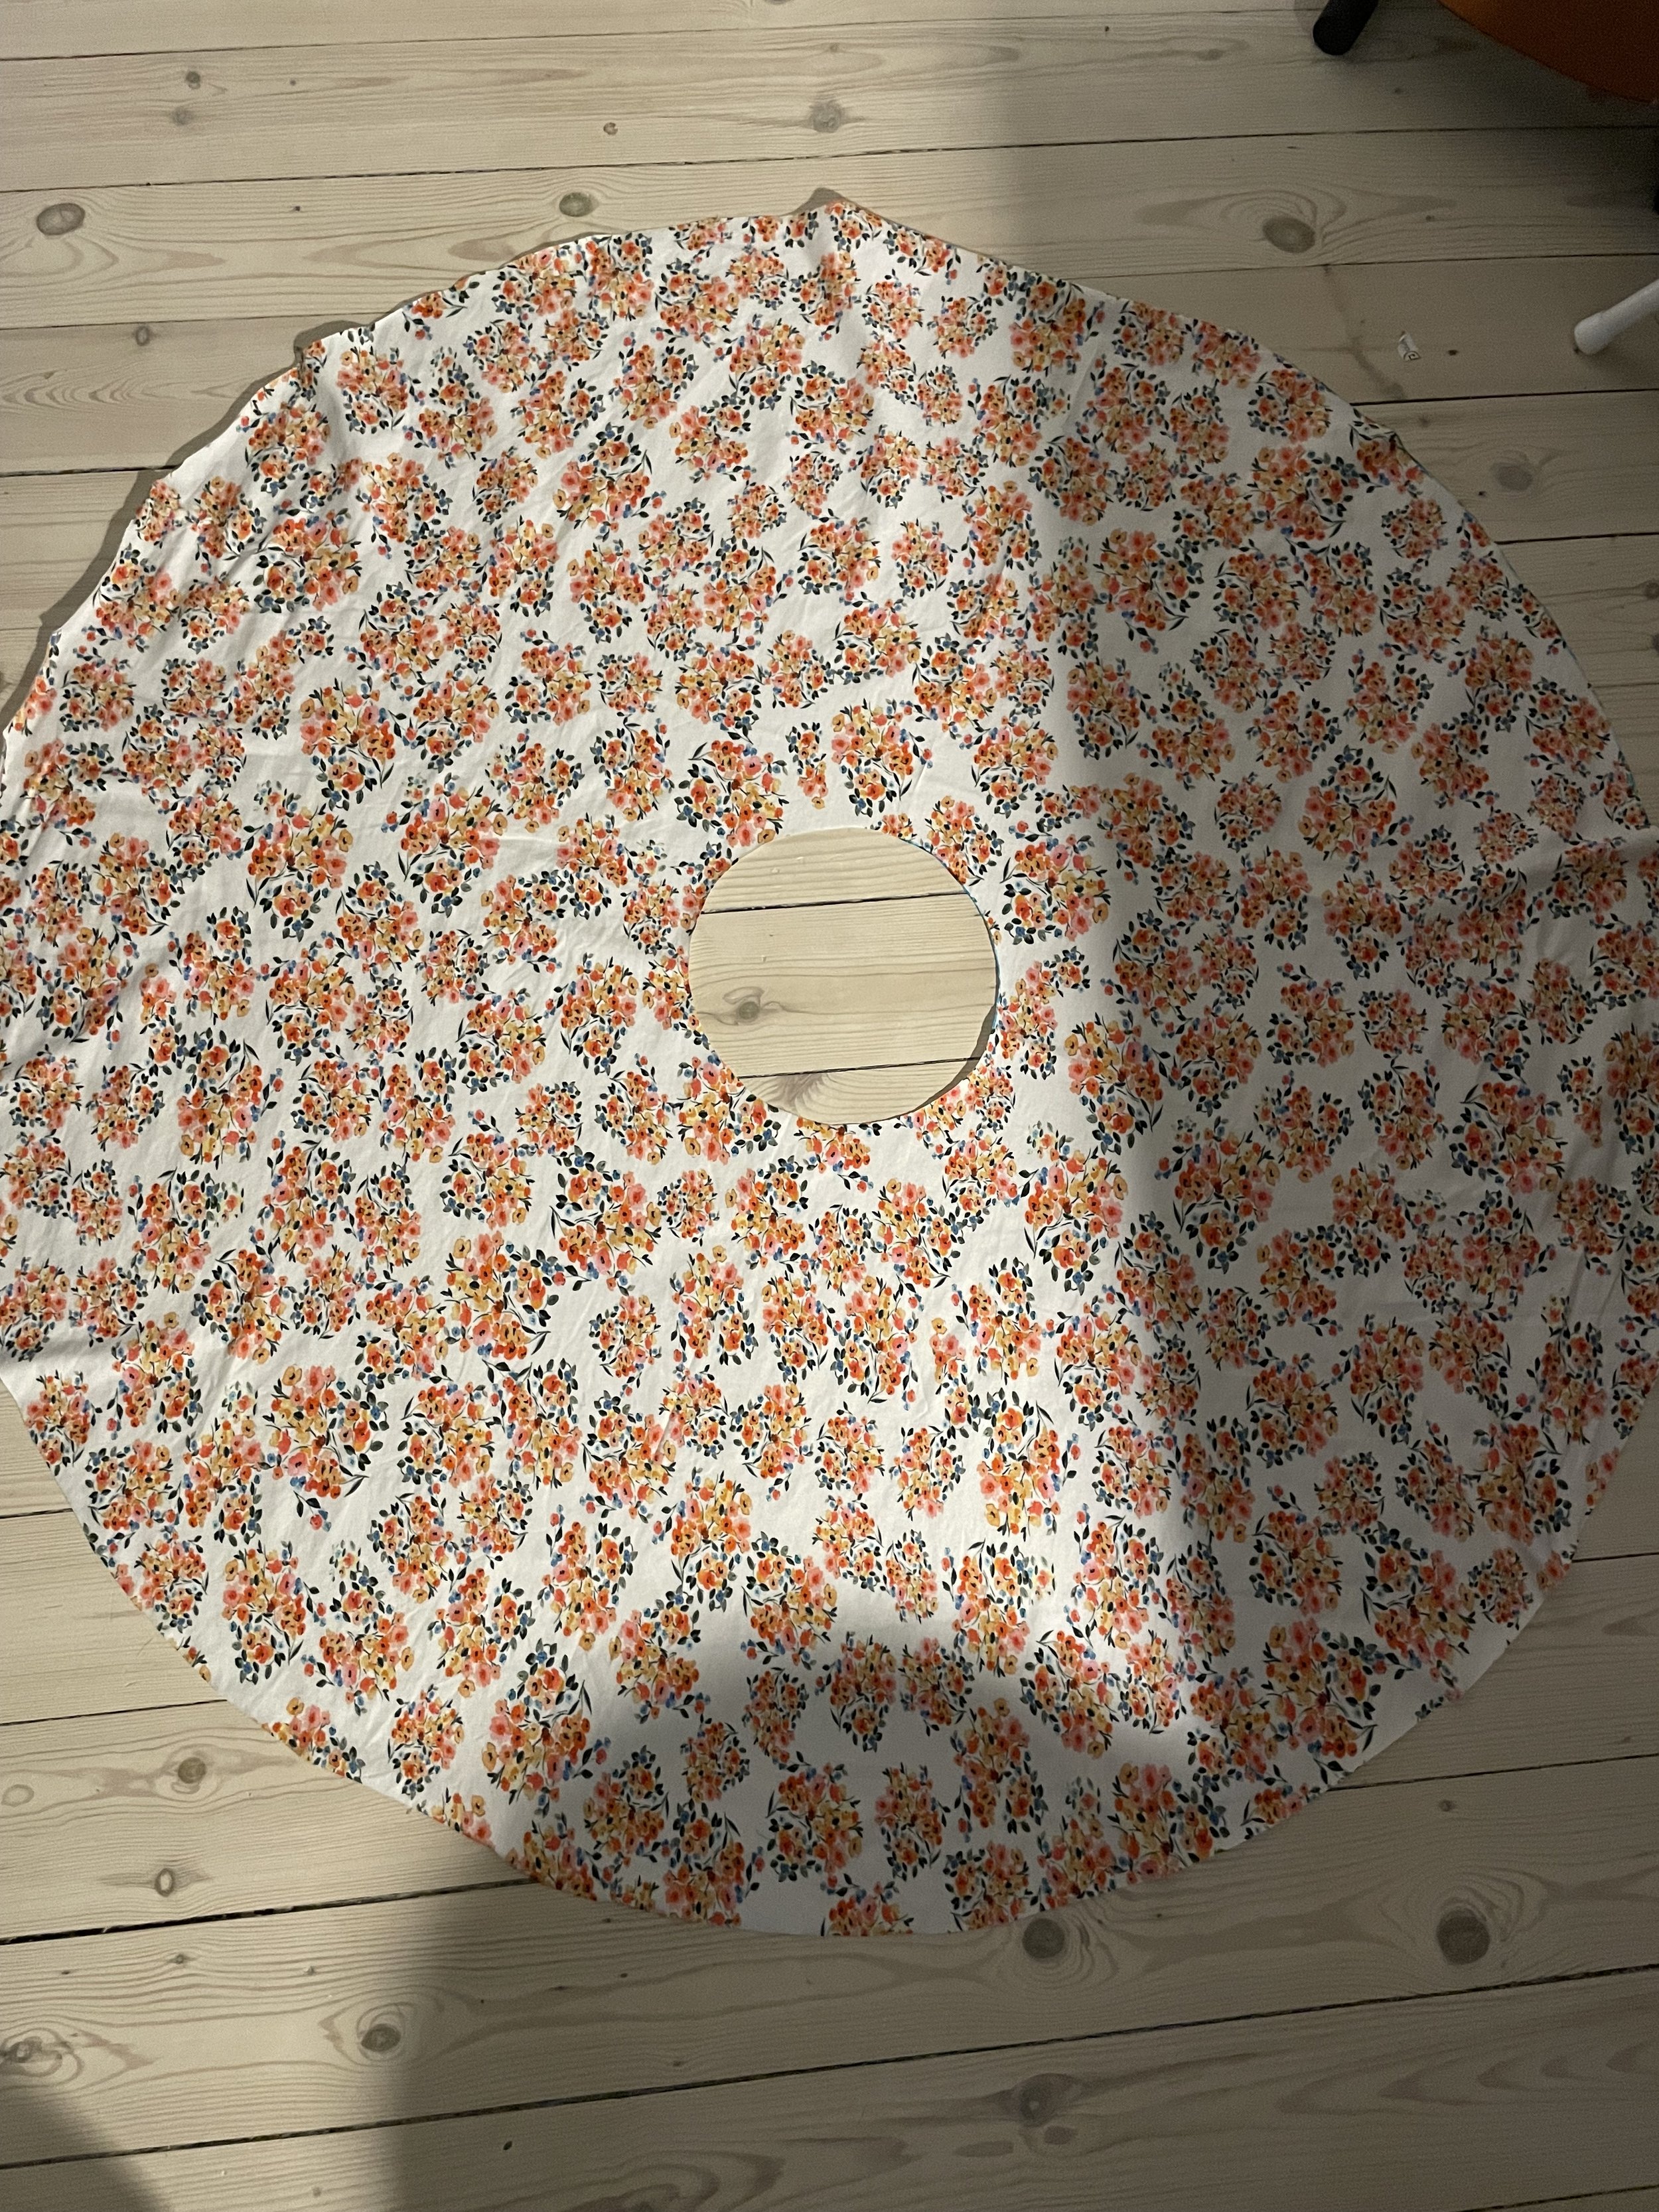
Open up the skirt, and there you have the full circle! (Or, as we call it in Danish: A full sun)
How to sew the waistband
Now, let’s move to the waistband.
Since my fabric had some stretch, my waist was a little too big after cutting.
Luckily this can be saved with a waistband, that will not only hold the skirt in place, but also look super cute.
Take your waist measurement x the width you would like for your waistband. Remember the negative ease, if you want it to fit snugly.
Once again I was limited my the size of my fabric, so I ended up cutting my waistband 63 cm (my waist measurement -2) x 15 cm.
If your fabric has stretch in it be sure to cut the length of the waistband along the stretch. Otherwise you will not be able to properly fit it.

Cut the waistband in your measurements. Make sure the stretch runs along the longest side.
Fold the waistband right sides together, matching up the short ends. Sew.
Now you have a band that should sit nicely around your waist, so make sure to try it on. If it’s too loose, you can unpick your stitching and sew it smaller. You can also install a wide elastic inside later to make sure it always fits snugly.

Attaching the waistband to the skirt
Now it’s time to attach the waistband to the skirt.
Start by folding the waistband in half, wrong side together. The divide the waistband into four sections, and mark each of the four points with a pin. Also divide the skirt into four sections and mark those with a pin.
Now match up the pins in the waistband with the pins in the skirt. The raw edge of the waistband should lay on top of the raw edge of the skirt waist. Pin together the skirt and waistband, stretching the waistband if needed (if you’re using stretch fabric).
Sew the waistband onto the skirt, making sure to stretch the waistband a little, so the skirt doesn’t fold. Finish the seam with a serger.
What if the skirt is too big?
Try on your skirt. If it’s too big, cut a wide elastic (I used a 3,5 cm wide elastic) so it sits nicely around your waist.
Cut a small hole on the inside of the waistband and slide the elastic through using a safety pin. Once all the elastic is through, sew the ends together (making sure the elastic is not twisted) and then close the small hole with a couple of stitches by hand.
Hem the skirt - and you’re done!
All you need to do now is hem your skirt. There are a few ways to do this:
Woven fabric: Serge and fold
If you’re using a woven fabric, start by serging/overlocking the edge. If you don’t own a serger, you can use the zigzag foot on your regular sewing machine.
The fold the edge toward the wrong side about 1 cm, press and stitch in place.
Woven fabric: Double fold
For this finish, you don’t need to serge the end, but this method takes a bit longer. I would say, though, that it’s also nicer.
Fold the fabric in by 5 mm and press. Fold it in by 5 mm again and press. Pin and stitch.
Stretch fabric: Twin needle
You don’t have to finish the edge of stretch fabric, since it will not fray like woven fabric does.
But you often can’t stitch with your regular machine settings, when sewing with knit fabrics, since the pull from the stretch can break the stitches.
That’s why twin needles are great!
A twin needle leaves to rows of stitching on top and a zigzag on the bottom, which is gives a nice looking and strong finish.
To thread your machine for a twin needle, simply use two spools of thread instead of one. I usually use my regular spool of thread + a bobbin with thread in matching color. However, for this skirt I was rather lazy and just extended the bobbin winder with a pen, so it could hold another spool of thread. It’s not pretty, but it worked.
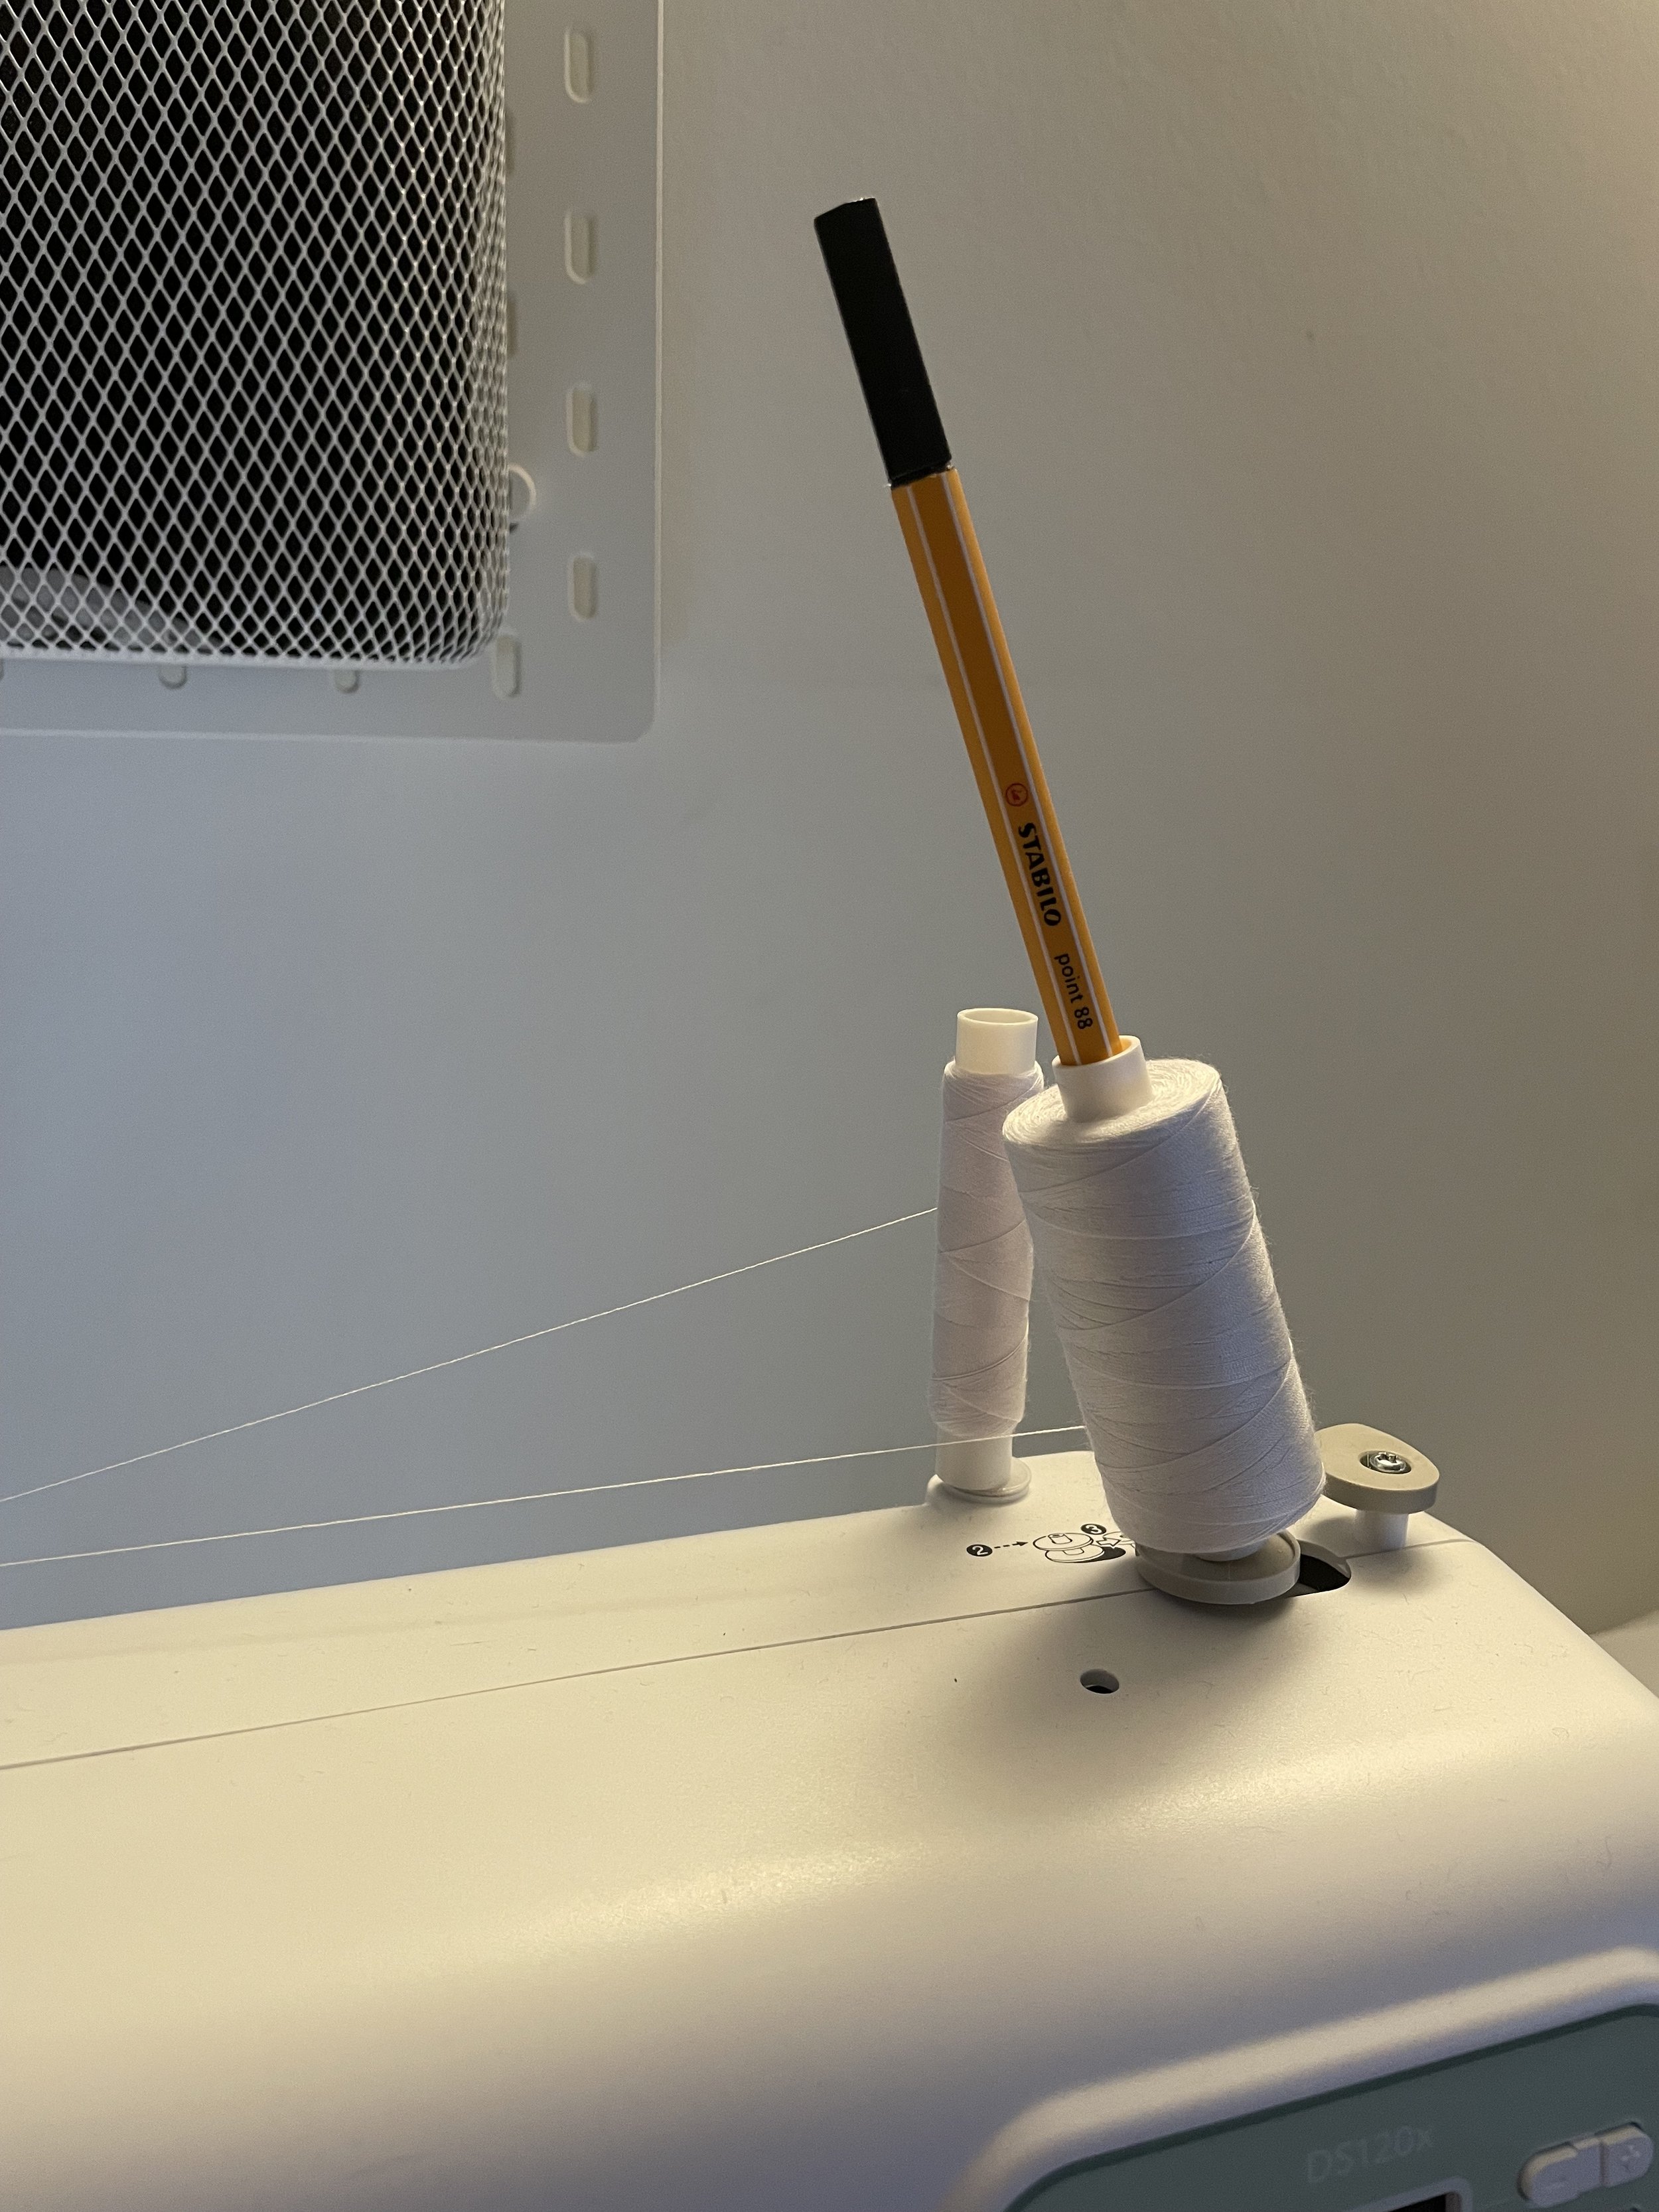
When using a twin needle, you need two spools of thread on top
When your machine is all set up with the twin needle, you just fold the fabric 1 cm to the wrong side and sew all the way around that beautiful skirt .
And that’s it!
You did it!
I really hope you liked this tutorial - if you have any questions or comments, feel free to write me or drop a comment below.
Laura
Ps here’s a reel of me twirling in my full circle skirt